Convert RAW to JPEG in Photoshop – Image Processor

[vc_row][vc_column][vc_column_text text_larger=”no”]
You can use Adobe Photoshop programs to save or convert your RAW images files to JPEG easily and automatically – saving you time and hassle. You won’t need any other software or add-ins. You do need Adobe Photoshop installed on your computer.
This steps can be used for any RAW format images:
- Convert RAW files to either JPEG, PSD, or TIFF formats
- Process camera raw files using the same options.
- Resize images to fit pixel dimensions.
- Embed copyright metadata in the JPEG images.
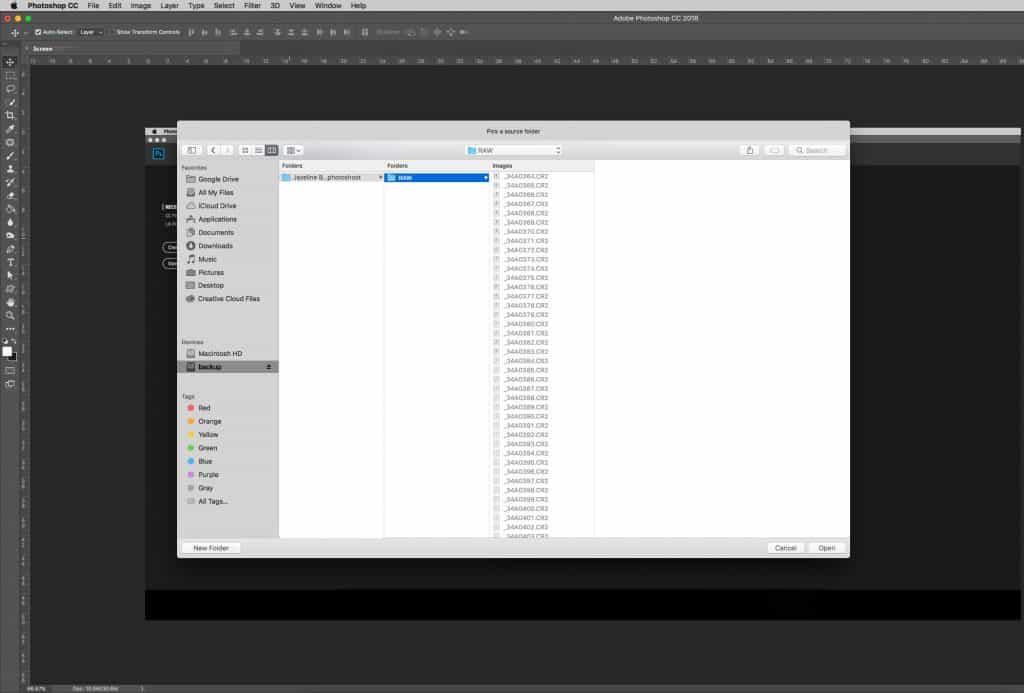
[/vc_column_text][/vc_column][/vc_row][vc_row][vc_column width=”1/2″][vc_single_image image=”2809″ img_size=”full” onclick=”link_image” title=”STEP 1″ parallax_scroll=”no”][/vc_column][vc_column width=”1/2″][vc_column_text text_larger=”no”]Open Photoshop >>> Files >>> Script >>> Image Processor[/vc_column_text][/vc_column][/vc_row][vc_row][vc_column width=”1/2″][vc_single_image image=”2810″ img_size=”full” onclick=”link_image” title=”STEP 2″ parallax_scroll=”no”][/vc_column][vc_column width=”1/2″][vc_column_text text_larger=”no”]Click select the folder button. A window will open. Store all your RAW images in a folder than select this folder.[/vc_column_text][/vc_column][/vc_row][vc_row][vc_column width=”1/2″][vc_single_image image=”2811″ img_size=”full” onclick=”link_image” title=”STEP 3″ parallax_scroll=”no”][/vc_column][vc_column width=”1/2″][vc_column_text text_larger=”no”]This folder contains the RAW files.[/vc_column_text][/vc_column][/vc_row][vc_row][vc_column width=”1/2″][vc_single_image image=”2812″ img_size=”full” onclick=”link_image” title=”STEP 4″ parallax_scroll=”no”][/vc_column][vc_column width=”1/2″][vc_column_text text_larger=”no”]Click on save in same location. This location will be the same location as your RAW folder. If you want to save in different location, select location button – which is below save in same location tab.[/vc_column_text][/vc_column][/vc_row][vc_row][vc_column width=”1/2″][vc_single_image image=”2813″ img_size=”full” onclick=”link_image” title=”STEP 5″ parallax_scroll=”no”][/vc_column][vc_column width=”1/2″][vc_column_text text_larger=”no”]Lastly, click Run.
Depending on your total RAW files and computer configuration, the processing takes some time. So, while it is processing, you can make yourself tea or coffee :)[/vc_column_text][/vc_column][/vc_row][vc_row][vc_column][vc_column_text text_larger=”no”]More options:
- You can select quality of JPEG file. Maximum is 11. So, you can select quality from 1 to 11. 1 being lowest quality, 11 being highest quality.
- You can also embed Actions (if you have actions).
- You can also include ICC profile (in the screenshot you can see www.cineviewstudios.com) you can put your name or company name so this information is embed in the JPEG images.
[/vc_column_text][/vc_column][/vc_row][vc_row][vc_column][vc_column_text text_larger=”no”]Hope this post is informative for you. If you are looking to hire a photo studio in London, contact us today! We offer affordable and professional studio hire services – Photo Studio Hire and Film Studio Hire.[/vc_column_text][/vc_column][/vc_row]